Browser UI using sshuttle VPN in WSL
Browser viewing a UI in Windows using sshuttle in WSL as a VPN
In this post we will create VPN connections using sshuttle in WSL for Windows 11. This post will focus on pointing a Browser to a URL in a private network in Windows. The private network - VPN - can be reached from sshuttle running in WSL. For this setup we unfortunately need to have a “double networking hop” in that Windows needs to be configured to send traffic to WSL (1) and WSL needs will then use sshuttle to (2) forward that traffic to the public network.
Getting Started
In order to use sshuttle VPN in Windows we need the following:
- Ability to
sshinto a host in the private network - Administrator Access in Windows if you want to open a browser with a URL in the private network.
- We need to have root access to our
WSLinstance. This is asshuttlerequirement.
DNS Considerations
Virtual Private Networks involve IP Addresses. However, you typically need more than just IP Addresses as we need a method to look up these IP Addresses. As we go through this please keep in mind how we resolve hosts and what network the DNS resolvers are in. More often than not the DNS resolver is also in the private network.
Example Scenario
Let’s take an example scenario.
- On my Windows 11 Machine I want load a web page on my browser to
someserver.somecompanywhich resolves to the address172.22.0.10 - The web server
someserver.somecompanyis in a private network172.22.0.0/24. - To view the page on
someserver.somecompanywe willsshuttleinto a remote host usingsshnamedlloydrochester.com. The remote hostlloydrochester.comis inside the172.22.0.0/24network and can connect to remote hostsomeserver.somecompany (172.22.0.10).
Network Diagram
Let’s dive right into a complex network diagram. We’ll then dive into each connection.
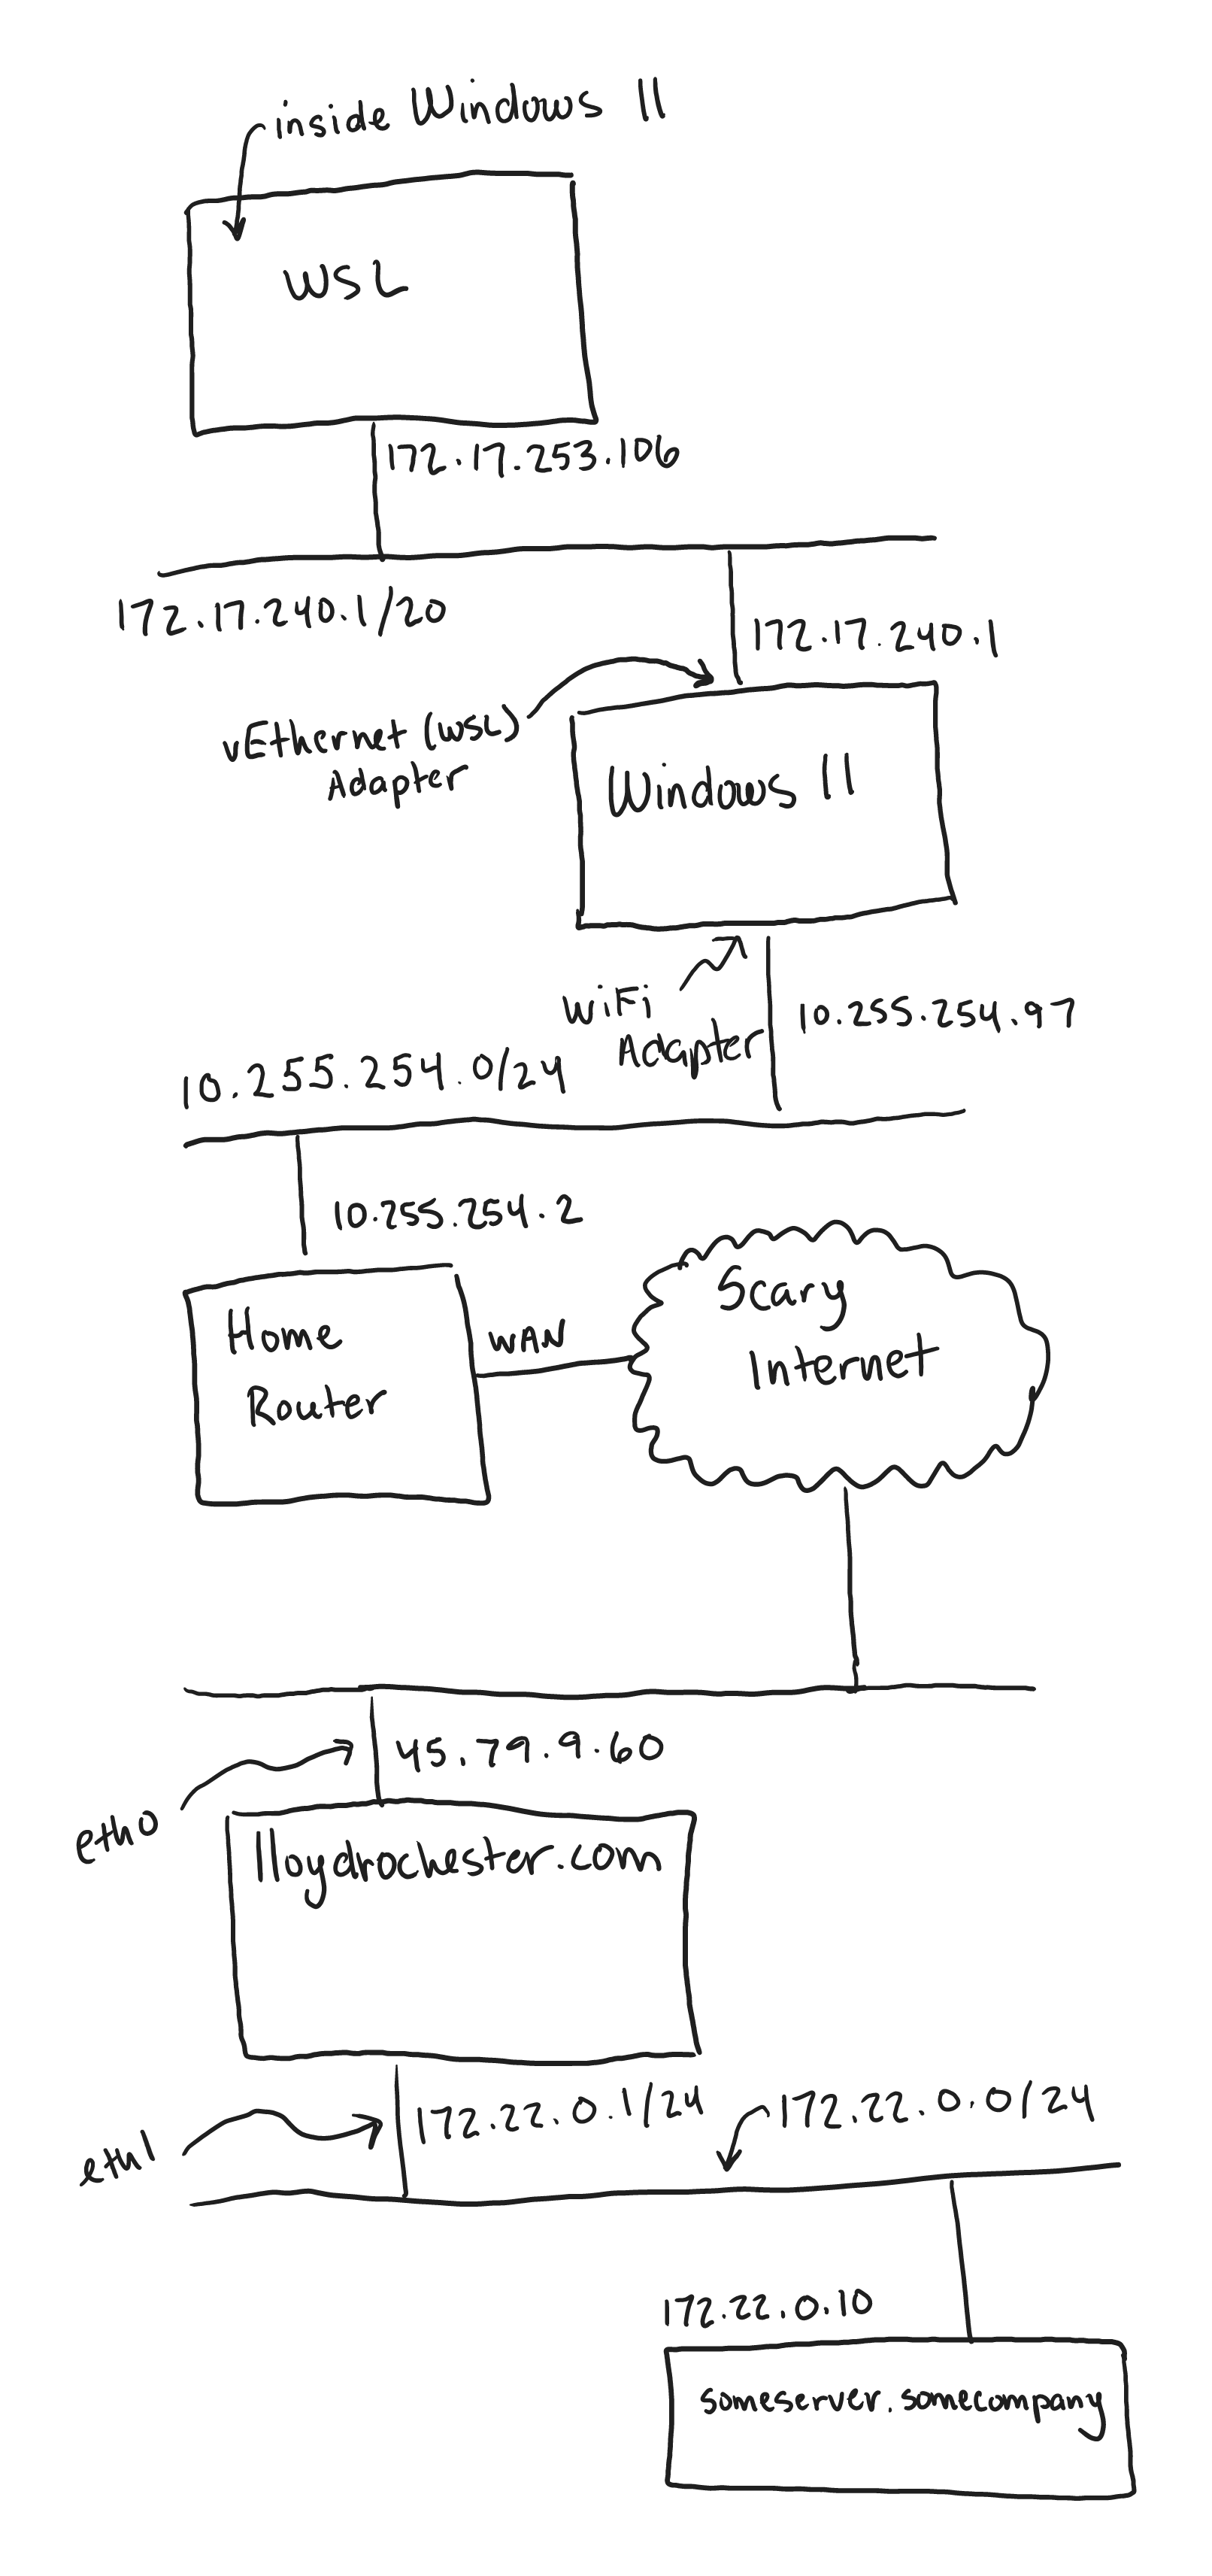
Network Diagram from Windows 11 through WSL running sshuttle VPN and connecting to a remote host
The diagram above shows a total of 4 networks! Let’s explain them:
- The WSL Server and Windows 11 share a bridge network. This is called
vEthernet (WSL)on my machine. - My Windows 11 machine is part of my home LAN network which I have the obscure
10.255.254.0/24network. Most people would likely have192.168.1.0/24. - To simplify things my home router connects to the internet through the WAN, we’re also calling this the public internet.
- On the public internet we have our remote server that we will
sshuttleinto called lloydrochester.com. - The host lloydrochester.com connects to the private network
172.22.0.0/24via theeth1network interface that we can use to connect tosomeserver.somecompany.
A basic VPN connection using sshuttle in WSL
If we want to access someserver.somecompany which resolves to 172.22.0.10 in this example we’d do the following sshuttle command:
sshuttle -r lloydrochester.com 172.22.0.0/24This is effectively saying we want to reach the 172.22.0.0/24 network via the remote host lloydrochester.com over SSH.
Now what about DNS? We need to somehow resolve someserver.somecompany:
Here are our options for DNS - some of these relate only inside our WSL instance:
- Put an entry into
/etc/hostsin Windows, and/or WSL if necessary. - Use the
sshuttleoptions--dnsto use the resolver inside/etc/resolve.confin the remote hostlloydrochester.comor even use the--to-ns=<server>option to specify a DNS resolver inside our private network172.16.0.0/24to take our queries. - Stand up a
dnsmasqinstance on our WSL. More on this option later.
Let’s stop here for DNS, for the remaing we’ll statically define it without DNS.
Giving Windows 11 some VPN love
Could we open up a browser to someserver.somecompany and have the page load? Nope. Why?
- The Windows 11 cannot resolve
someserver.somecompany. - Even if Windows 11 could resolve what would make it forward packets to our WSL instance?
- If our WSL instance receives packets destined for
someserver.somecompanywill it route them properly?
Let’s solve each of these problems one-by-one.
Simple Resolution of hosts in Windows 11 to our WSL Instance
For Windows 11 to resolve someserver.somecompany it’s easiest to use the Windows version of /etc/hosts in the file C:\Windows\System32\drivers\etc\hosts. This needs Administrator access but we can add the entry as such.
<our WSL IP address> someserver.somecompanyWe’ll use the trick of pointing someserver.somecompany to our WSL instance. To know the entry to add to the Windows host file simply run the following.
lloydroc@nifty:~$ ip route get 8.8.8.8
8.8.8.8 via 172.17.240.1 dev eth0 src 172.17.253.106 uid 1000
    cache
lloydroc@nifty:~$
Here we need to look at the src IP address and also take note of the device name eth0. Thus, I’d add the following line to C:\Windows\System32\drivers\etc\hosts:
172.17.253.106 someserver.somecompanyYour WSL instance will undoubtedly have a different address and perhaps device name depending on the flavor of Linux.
Proxy a connection from Windows to WSL
It turns out if Windows wants to make a connection to a WSL instance it needs to be explicitly specified. To do this we need to open a Power Shell terminal with Administrator privileges and run the following:
netsh interface portproxy add v4tov4 listenport=0-9000 connectaddress=172.17.253.106 connectport=0-9000 listenaddress=172.17.253.106Please ensure you swap out 172.17.253.106 for the IP address of your WSL instance.
After, you’ve done this go ahead and run:
netsh interface portproxy show alland if you need to remove the proxy run:
netsh interface portproxy resetTesting a connection from Windows into WSL
This is when I like to test a connection from Windows to someserver.somecompany can connect inside WSL. Let’s assume someserver.somecompany is running on port 80. We can use netcat for this:
In WSL I run:
sudo nc -kl 80Now we’re listening on port 80 in WSL. So let’s test a connection from Windows in Power Shell.
PS C:\Users\lloyd> Test-NetConnection -ComputerName someserver.somecompany -Port 80


ComputerName     : someserver.somecompany
RemoteAddress    : 172.17.253.106
RemotePort       : 80
InterfaceAlias   : vEthernet (WSL)
SourceAddress    : 172.17.240.1
TcpTestSucceeded : True
The TcpTestSucceeded : True proves this is working.
TCP Forwarding from our WSL to our Private Network
From the configuration above we have connections coming in from someserver.somecompany using our WSL IP address 172.17.240.1. We now need to forward these packets to the private network with the actual address of someserver.somecompany which is 172.22.0.10. For this we’ll use socat which is a multipurpose relay in Linux.
socat TCP4-LISTEN:80,reuseaddr,fork TCP4:172.22.0.10:8000Note, that the proxy listens on port 80 but proxies to the remote server on port 8000.
With this command running when connections come in from Windows on address:port 172.17.253.106:80 - our WSL IP address - they will be proxied to address:port 172.16.1.10:80. The address 172.16.1.10 is inside the subnet that is being served by our sshuttle command above.
Hosting a Web Page on our Private Network
Since I have a limited setup I will add an additional IP to the remote SSH server (lloydrochester.com) and host a web page off this IP address.
sudo ip address add 172.22.0.10/32 dev eth0Now setup from inside lloydrochester.com to the webpage.
$ cat index.html
<html>
<head></head>
<body>
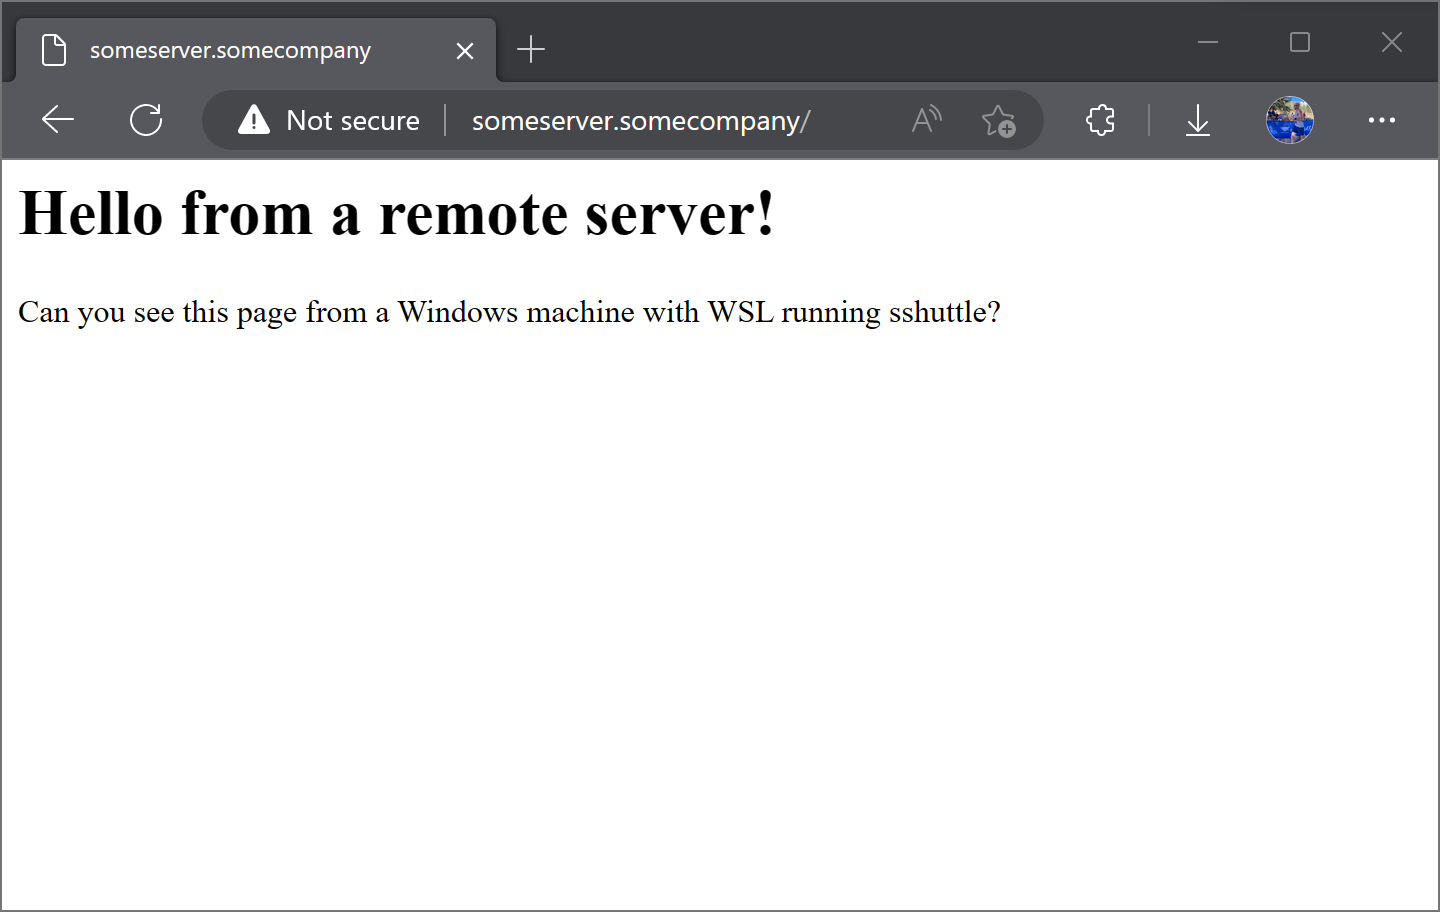
<h1>Hello from a remote server!</h1>
<p>Can you see this page from a Windows machine with WSL running sshuttle?</p>
</body>
</html>
$ sudo python3 -m http.server --bind 172.22.0.10
Serving HTTP on 172.22.0.10 port 8000 (http://172.22.0.10:8000/) ...From here I can open up a browser in Windows and see the following:
Browser viewing a UI in Windows using sshuttle in WSL as a VPN
Where to go from here?
The setup required here is far from easy. It has multiple moving parts making it impractical for most use cases. I hope to post later proposing some better options. Here is what we can do to make these steps easier:
- Separate the Windows and WSL portions into their own scripts that have all of our commands.
- You can look at running
dnsmasqin WSL that will resolve addresses for us in WSL. Note, there is no easy way to do this resolution in Windows. We can point the Windows DNS to our WSL andnetsh interface portproxyDNS requests to our DSL, but this comes with additional complexity.