This post explains how to wire up the UART and the mode pins. We need 5 connections between the Raspberry Pi and EByte E32, as well as a power and a ground. See this software installation after the wiring is complete.
Wiring
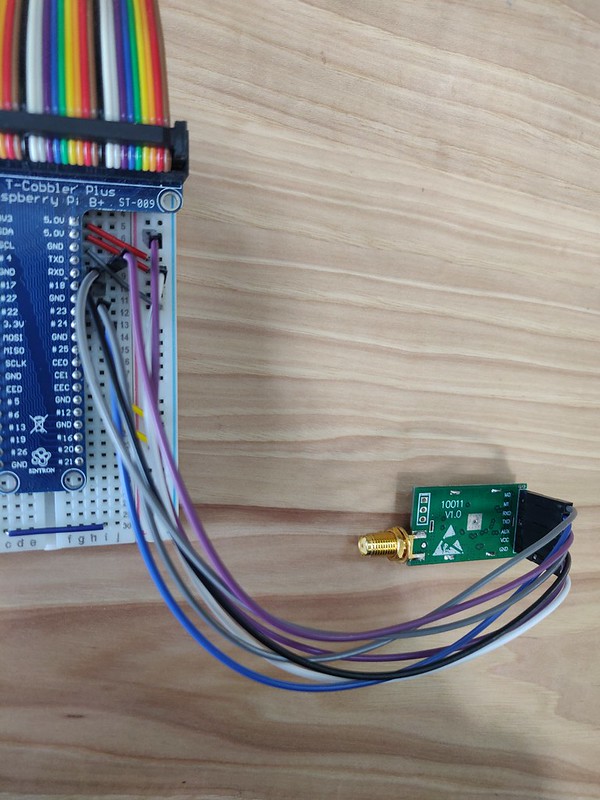
Here is the wiring between the E32 and the Raspberry Pi. Please make sure the UART TX of the RPI is wired to the RX of the E32 and vice-versa.
| RPI Pin | RPI Desc | E32 Pin |
|---|---|---|
| +5V | +5V Power | VCC |
| GND | Ground | GND |
| GPIO23 | General Purpose I/O 23 | M0 |
| GPIO24 | General Purpose I/O 24 | M1 |
| GPIO18 | General Purpose I/O 18 | AUX |
| GPIO14 UART TX | /dev/ttyAMA0 TX | RX |
| GPIO15 UART RX | /dev/ttyAMA0 RX | TX |
Configuring the Serial Port
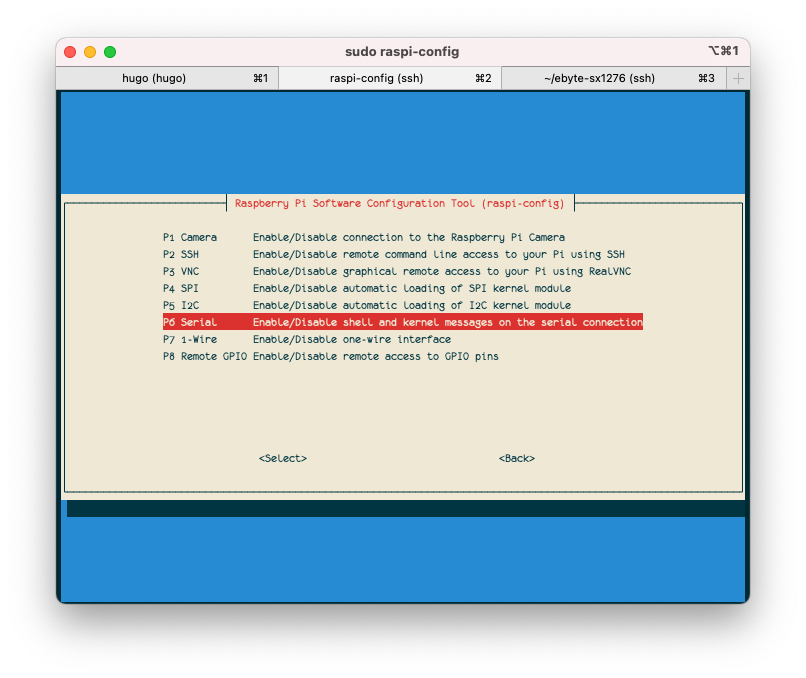
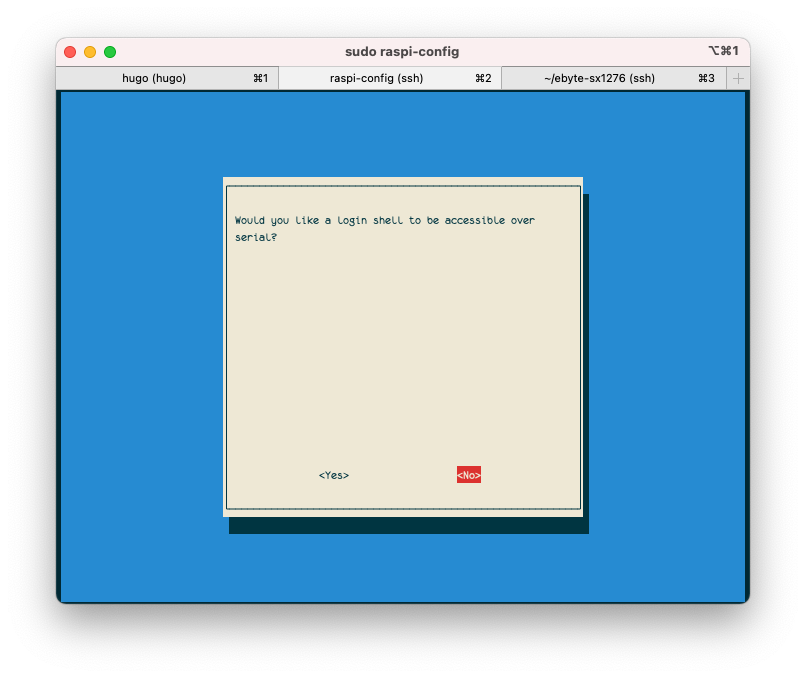
Using the sudo raspi-config command we need to configure the serial port to be enabled but not be accessible for a login shell. If we enable the login shell it will break because interfacing with the e32 requires a binary interface without the buffering and control required to interface over terminals.

Additional Required Serial Port Settings and Verification
Typically, a soft link will be created /dev/serial0 to the actual UART port:
$ ls -l /dev/serial0
lrwxrwxrwx 1 root root 10 Dec  1 13:49 /dev/serial0 -> /dev/ttyAMA0
Please note, that depending on the Raspberry Pi version it may not be /dev/ttyAMA0 but maybe /dev/ttyS0 or something else. The e32 program will default to usign /dev/serial0 unless specified otherwise.
Check the following permissions.
$ whoami
pi
$ groups # require dialout, tty, and gpio. Log out for it to take effect
pi adm tty dialout cdrom sudo audio video plugdev games users input netdev gpio i2c spi
$ ls -l /dev/ttyAMA0 # see that the dialout group can read
crw-rw---- 1 root dialout 204, 64 Apr  6 11:53 /dev/ttyAMA0
$ stty -F /dev/ttyAMA0 -a
speed 9600 baud; rows 0; columns 0; line = 0;
intr = ^C; quit = ^\; erase = ^?; kill = ^U; eof = ^D; eol = <undef>; eol2 = <undef>; swtch = <undef>; start = ^Q;
stop = ^S; susp = ^Z; rprnt = ^R; werase = ^W; lnext = ^V; discard = ^O; min = 0; time = 0;
-parenb -parodd -cmspar cs8 hupcl -cstopb cread clocal -crtscts
-ignbrk -brkint -ignpar -parmrk -inpck -istrip -inlcr -igncr -icrnl -ixon -ixoff -iuclc -ixany -imaxbel -iutf8
-opost -olcuc -ocrnl onlcr -onocr -onlret -ofill -ofdel nl0 cr0 tab0 bs0 vt0 ff0
-isig -icanon -iexten -echo echoe echok -echonl -noflsh -xcase -tostop -echoprt echoctl echoke -flusho -extproc
$
Note, in the stty command we are looking primarily for rows 0; columns 0; line = 0;. The command line tool e32 will modify the terminal for it’s needs. If you don’t have the baud rate at 9600 or all the other options don’t worry the e32 command line tool will configure the terminal correctly and in raw mode.
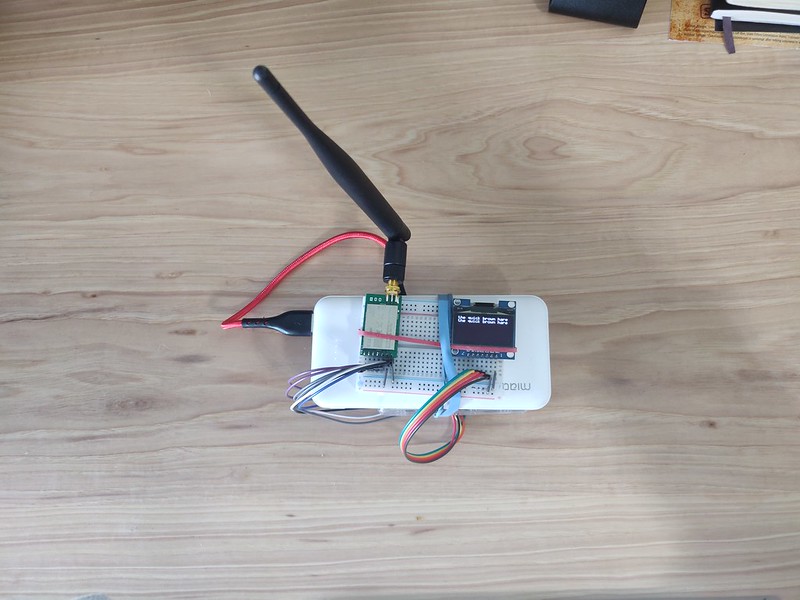
Raspberry Pi Receiver
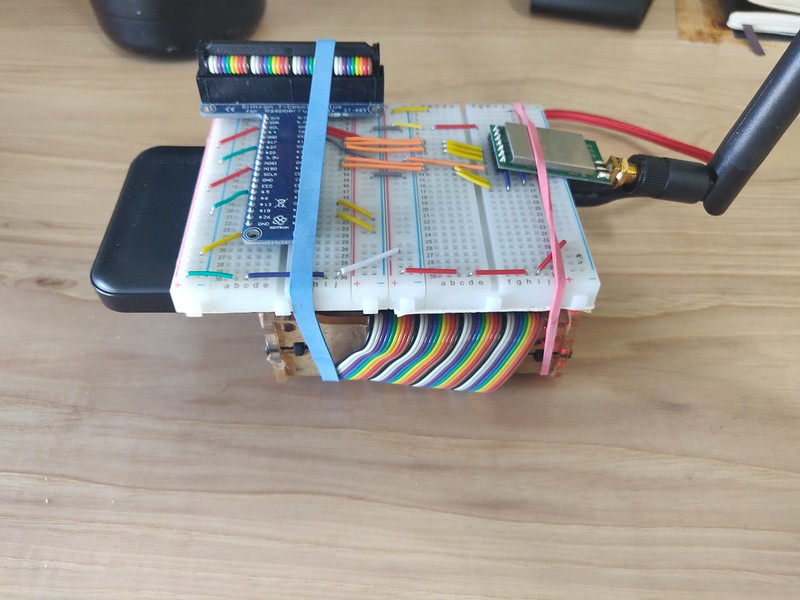
Below is a picture of the Receiver using the Raspberry Pi. It has a little SSD1306 Display module displaying the quick brown fox on the OLED. These are stacks with a Raspberry Pi B+ in a case, a battery, a bread board and the components wired together using the breadboard.
Raspberry Pi Lora Receiver with E32
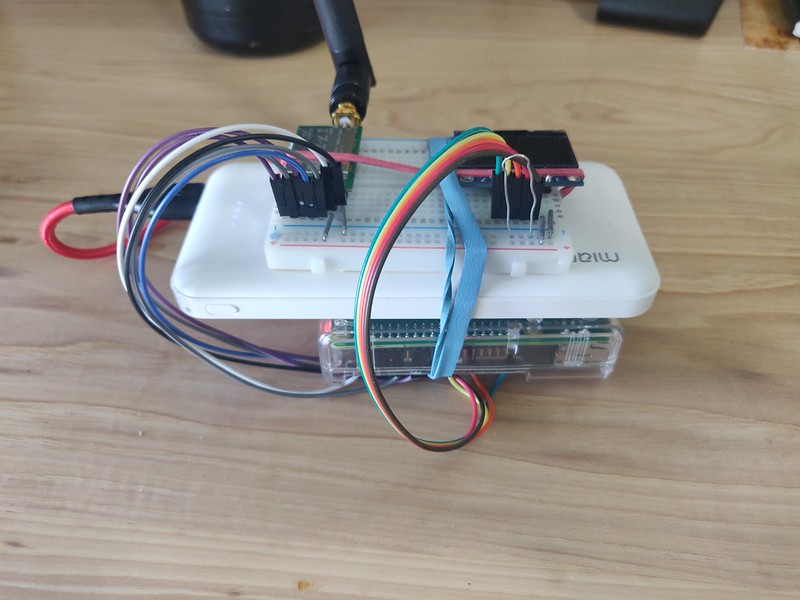
Side view of the receiver module.
Raspberry Pi Lora Transmitter with E32
The transmitter is simply a battery and the E32 wired directly to the RPi.
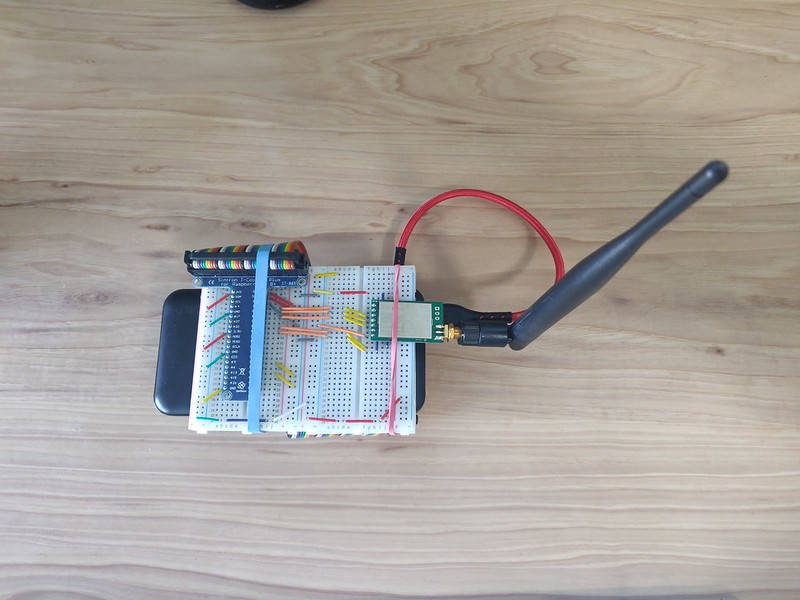
Side view of the transmitter.